Tuesday, August 27, 2013

Install Subversion 1.6 in Ubuntu 13.04


As you know, we can't perform svn commands on a Subversion 1.6 working copy using a Subversion 1.7 client. But in Ubuntu 13.04, the default Subversion package is 1.7. 1.7 is certainly far superior in comparison to 1.6 in terms of speed. But I need to be able to do svn operations on 1.6 working copies. So, I needed two versions of subversion client. The only way I found for this is the following. This might help you too.

We need Java for this to work. So, if you do not have Java installed, install it before continuing.

First, install svnkit.. This installs several packages that is needed for svnkit. In 13.04, we get the svnkit 1.7.5 which comes with support for Subversion 1.7.

sudo apt-get install svnkit

Now, uninstall svnkit and libsvnkit-java packages. We do not need the 1.7.5 version of these since we need Subversion 1.6 support.

sudo apt-get remove svnkit libsvnkit-java

Now, go to a Ubuntu mirror site. I have used the Ubuntu mirror site for Sri Lanka.
http://lk.archive.ubuntu.com/ubuntu/pool/universe/s/svnkit/

There, download, and install the following two packages.

libsvnkit-java_1.3.5+dfsg-3_all.deb
svnkit_1.3.5+dfsg-3_all.deb

You can install these by using the command "sudo dpkg -i *deb" command or simply double-clicking in these.

Now, you have SVN 1.6 installed. To run, use the command jsvn instead of svn.

jsvn --version

You might need to set the JAVA_HOME variable if jsvn is failing to locate java. If so, open up /usr/bin/jsvn (which is a simple bash script), and edit the JAVA_HOME variable there accordingly.

Good luck!


Thursday, July 18, 2013

WS-Discovery with CXF-based JAX-WS/JAX-RS in WSO2 AS

Apache CXF has added out-of-the-box support for WS-Discovery for CXF based JAX-WS and JAX-RS services starting from CXF 2.7.x versions. This post describes how to add this support to WSO2 Application Server with WSO2 Governance Registry (GReg) acting as the DiscoveryProxy receiver.

All the WSO2 Carbon-based service hosting products like WSO2 Application Server supported WS-Discovery for axis2 services (including data services, proxy services etc.) for a long time. These products can be configured to announce the axis2 services to a Governance Registry instance. But we did not have a way to announce CXF-based JAX-WS and JAX-RS services. But with the out-of-the-box support for WS-Discovery that comes with CXF this is now possible. Following steps describes how to add WS-Discovery to jax webapps.

  1. Download the latest WSO2 Application Server (AS) pack.
  2. Copy the following three jars to {WSO2-AS-HOME}/lib/runtimes/cxf
    • cxf-services-ws-discovery-service  - version 2.7.5
    • cxf-services-ws-discovery-api  - version 2.7.5
    • mina-core - version 2.0.7
  3. Add a CXF Configuration File (cxf.xml) to the WEB-INF/classes/ location of a webapp.
  4. Add a bus property "org.apache.cxf.service.ws-discovery.address" which points to the DiscoveryProxy instance residing in GReg. To do that,
    1. Open up cxf.xml we added to the webapp before. There, under the 'cxf' bean (which uses the class org.apache.cxf.bus.spring.SpringBus), add the property "org.apache.cxf.service.ws-discovery.address" and set it to the DiscoveryProxy service URL of GReg. The default service URL is https://localhost:9443/services/DiscoveryProxy for a WSO2 GReg instance running in local machine with port offset 0. The properties are stored as a map. A sample cxf.xml would look like the following. [1]


<property name="properties">
    <map>
        <entry key="org.apache.cxf.service.ws-discovery.address" value="https://localhost:9443/services/DiscoveryProxy" />
    </map>
</property>


     5. Deploy the webapp


[1] Sample cxf.xml

<beans xmlns="http://www.springframework.org/schema/beans"
       xmlns:xsi="http://www.w3.org/2001/XMLSchema-instance"
       xmlns:context="http://www.springframework.org/schema/context"
       xsi:schemaLocation="
http://www.springframework.org/schema/beans http://www.springframework.org/schema/beans/spring-beans.xsd
http://www.springframework.org/schema/context http://www.springframework.org/schema/context/spring-context.xsd">

    <bean id="cxf" class="org.apache.cxf.bus.spring.SpringBus" destroy-method="shutdown">
        <property name="properties">
            <map>
                <entry key="org.apache.cxf.service.ws-discovery.address" value="http://localhost:8080/services/DiscoveryProxy" />
            </map>
        </property>
    </bean>

    <bean id="org.apache.cxf.bus.spring.BusWiringBeanFactoryPostProcessor" 
        class="org.apache.cxf.bus.spring.BusWiringBeanFactoryPostProcessor"/>
    <bean id="org.apache.cxf.bus.spring.Jsr250BeanPostProcessor" 
        class="org.apache.cxf.bus.spring.Jsr250BeanPostProcessor"/>
    <bean id="org.apache.cxf.bus.spring.BusExtensionPostProcessor" 
        class="org.apache.cxf.bus.spring.BusExtensionPostProcessor"/>

</beans>


Sample Hello Message sent from AS to GReg

<soap:Envelope xmlns:soap="http://www.w3.org/2003/05/soap-envelope"
               xmlns:wsa="http://www.w3.org/2005/08/addressing"
               xmlns:tns="http://docs.oasis-open.org/ws-dd/ns/discovery/2009/01">
    <soap:Header>
        <wsa:Action>http://docs.oasis-open.org/ws-dd/ns/discovery/2009/01/Hello</wsa:Action>
        <wsa:MessageID>urn:uuid:5063d2d5-4c8c-4f86-b1a0-9c3a17421af2</wsa:MessageID>
        <wsa:To>http://localhost:8080/services/DiscoveryProxy</wsa:To>
        <wsa:ReplyTo>
            <wsa:Address>http://www.w3.org/2005/08/addressing/none</wsa:Address>
        </wsa:ReplyTo>
    </soap:Header>
    <soap:Body>
        <ns2:Hello xmlns="http://www.w3.org/2005/08/addressing"
                   xmlns:ns2="http://docs.oasis-open.org/ws-dd/ns/discovery/2009/01">
            <EndpointReference>
                <Address>urn:uuid:e67f250f-9402-4c53-bb1f-da1ffe985ebc</Address>
            </EndpointReference>
            <ns2:Types xmlns:ns3="http://server.hw.demo/">ns3:HelloWorld</ns2:Types>
            <ns2:Scopes/>
            <ns2:XAddrs>/hello_world</ns2:XAddrs>
            <ns2:MetadataVersion>1</ns2:MetadataVersion>
        </ns2:Hello>
    </soap:Body>
</soap:Envelope>


Monday, April 29, 2013

Customize the height of header div of Docbook Webhelp in Docbook 1.78.1


Recently, I've been getting some queries on how to change the height of the docbook webhelp html output. This has been straight forward in the previous releases where, where you just change the CSS height property of #header, #content, and #leftnavigation. But starting from Docbook xsl release of 1.78.0, you need to do an additional change to get it working because of the introduction of left panel resize handler.

The left panel resize handler is a feature introduced with 1.78.0 to let the users resize it as they wish in case the contents of left navigation panel is not completely visible. {webhelp-dir}/template/common/splitterInit.js .  There, we divide the webhelp output in to main three sections. the 

  • North pane - #header
  • West pane - #sidebar
  • Center pane - #content

Then, it gives you the ability to add resize handler to the edges of these three panes. In the case of webhelp, we have suppressed the ability of users to resize the north pane, and kept only the left pane resizable. I believe the reasons are obvious. So, that's a little intro about the resize handler. 

Now, if you want to customize the header, first you need to few modifications to this file. Here, I'm explaining how to change the height of the #header.

  • First, open {webhelp-dir}/template/common/splitterInit.js
  • Look for the attribute north__minSize in that file. Currently, it has the value 99 which is in pixels. This values over-rides the #height css property in positioning.css. So, change this value to a height you like. 
  • Change the the height of #content, and #leftnavigation appropriately.
You might want to replace the header-bg.png with a wider image too.


Friday, April 26, 2013

Highlights of WSO2 ESB 4.6.0 Documentation

With WSO2 ESB 4.6.0 release, we have seen lot of improvements in several areas including the Passthru transport which provides far better performance compared to the NIO transport. The comparison include the latest ESBs of Talend, Mule and WSO2 ESB 4.5.1 vs WSO2 ESB 4.6.0. We have chosen to do the benchmark on two different WSO2 ESB versions to show the performance gain we have received. You can find the architectural details at Hiranya's blog How the World's Fastest ESB was Made.

While these were, one of the complains WSO2 had was the lack of documentation. Some of the cool features go unnoticed because of this, and people have faced some difficulties finding what they want. So, after the release of Carbon 4.0.0 release, WSO2 has given special attention on getting the documentation right. We have held several documentation hackathons, discussions and we I believe we have come up with a decent set of documentation now.

WSO2 promotes the documentation in the means of the WSO2 documentation site, WSO2 OT knowledge-base articles, blogs etc. This time, we have focused on our official documentation site, http://docs.wso2.org.

So, I wanted to share the highlights of the documentation of WSO2 ESB 4.6.0. It shows the capabilities of ESB with examples covering quite a lot of use-cases of any given features with examples. We still have a lot to write, but I guess we have come a long way so far.

The ESB 4.6.0 documentation is located here - http://docs.wso2.org/wiki/display/ESB460/Enterprise+Service+Bus+Documentation

We can first start with the FAQ page - http://docs.wso2.org/wiki/display/ESB460/FAQ
This is a good starting page to know whether WSO2 supports a given feature, where we can find the performance numbers, introduction to common components of ESB like endpoints, mediators, sequences etc.

REST Supporthttp://docs.wso2.org/wiki/display/ESB460/REST+Support
With WSO2, you can have REST support using either proxy services, or the rest api. Each of these are explained with a message flow diagrams, sample configuration proxy/rest-api, sample request, and response.

JMS Supporthttp://docs.wso2.org/wiki/display/ESB460/Java+Message+Service+%28JMS%29+Support
Explains how to use JMS with ActiveMQ, QPid, or the wso2 in-house AMQP implementation, Andes, with WSO2. Under the JMS usecases section, you will see that the common scenarios are covered.

SAP Integraion -
http://docs.wso2.org/wiki/display/ESB460/SAP+Integration
Describes integrating SAP systems with WSO2 ESB

Clustering WSO2 ESB - Worker-Manager separation with ELB
http://docs.wso2.org/wiki/display/ESB460/Clustered+Deployment
Explains how to setup the WSO2 worker-manager separation fronted by WSO2 Elastic Load Balancer.  Has detailed info on each of the configuration that needs to be made.

The Samples Guidehttp://docs.wso2.org/wiki/display/ESB460/Samples
The usual samples guide

ESB Monitoringhttp://docs.wso2.org/wiki/display/ESB460/Monitoring+the+ESB
Covers the JMX Monitoring, Monitoring the mediation, transport, system statistics among others.
In addition to this, you can integrate WSO2 Business Activity Monitor (BAM) with WSO2 ESB, and see the detailed statistics employing MapReduce technologies. You can find more info here - http://docs.wso2.org/wiki/display/BAM220/Setting+up+Mediation+Data+Agent

Performance Tuninghttp://docs.wso2.org/wiki/display/ESB460/Performance+Tuning

Hope the above are useful.


Thursday, April 25, 2013

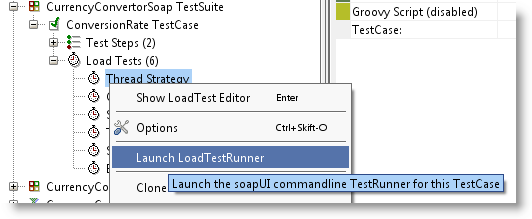
Run soapUI via Command-Line in Linux


I always wanted to run soapui load tests via command line because then I could run it on a remote machine that I SSH to. I don't want to run it on my machine because it slows down the machine considerably, so I can't do my day-to-day work with it. That will also affect the result of soapui.

Recently, I wanted to re-produce a OOM issue in WSO2 ESB. So, the setup was, the ESB instance was running on one server, soapui load tests, JConsole, and JProfiler on my machine. So, I only wanted to keep the monitoring softwares, ie. the JConsole, and JProfiler in my machine, and move the soapui tests to another server instance. It turned out this is actually pretty simple.

First, start up the soapui gui interface, and save the project you already have. If you don't have one, create a new one, and set all the load tests parameters appropriately. These include setting the soap message, no. threads, time limit etc. Let's save it as myProxy-test-soapui-project.xml.

This file, myProxy-test-soapui-project.xml, contains all the necessary information regarding the project. It include the WSDL file, the endpoints, load test info etc. This makes it easier run the same test on another machine. You just have to transfer this file. Then you can run the command in a terminal with soapui in place.


  • Transfer the saved soapui project file to the server where you wish to run the load tests. ex. scp
  • Download soaup from here - I got soapui-4.5.0-linux-bin.zip -  http://sourceforge.net/projects/soapui/files/soapui/4.5/
    • Let's called the extracted folder of this as $SOAPUI_HOME
  • Copy the following command, and change it to match your needs.


sh $SOAPUI_HOME/bin/loadtestrunner.sh -s"TestSuite Name" -c"Testcase name" -l"LoadTest name" -r -f/home/kasun/load-tests/reports/ /home/kasun/load-tests/myProxy-test-soapui-project.xml

Here, the names can be easily copied from the project hierarchy from the left-side Navigator tab.
Example command look like the following. Run it with nohup, so the process won't be killed if you disconnect from the server. 


sh /home/kasun/load-tests/soapui-4.5.0/bin/loadtestrunner.sh -s"myProxySoap11Binding TestSuite" -c"myProxySoap11Binding TestSuite" -l"LoadTest 1" -r -f/home/kasun/load-tests/reports/ /home/kasun/load-tests/myProxy-test-soapui-project.xml


Tuesday, April 23, 2013

Generating p2-repo for custom WSO2 Features, and Components


Here, I'm going to discuss how to generate a p2-repo for custom, user-written WSO2 components, and features. This can be easily achieved using the maven plugin, carbon-p2-plugin, that WSO2 have written.
First, you may have a look at Creating-your-own-wso2-carbon-components webinar to know how to write carbon components, and a feature for those components. It covers quite a lot of basics, and best practices as well.
Now, to install these features to WSO2 products like WSO2 Enterprise Service Bus, you need to generate a p2-repository. Then, you can add that p2-repo via the "Feature Management" utility in management console, and install the features you want. p2-repo concept comes from the underline Eclipse equinox project that WSO2 products use. In the following I will tell you how to generate a p2-repo for your features.
  • Simply create a new maven project (packaging: pom)
  • Add carbon-p2-plugin as a maven plugin
    <plugin>
        <groupId>org.wso2.maven</groupId>
        <artifactId>carbon-p2-plugin</artifactId>
        <version>1.5.2</version>
        ---
    </plugin>
  • Then set the features you want to publish under the carbon-p2-plugin plugin configuration as shown in the following sample pom.xml.  
  • This sample pom.xml was copied from the p2-repo generation pom.xml of carbon 4.1.0, and I simplified it for clarity.
  • There are two sample feature definitions I have specified. Replace those featureArtifactDef with your own feature definitions. The format is $groupId:$artifactId:$version.

I have tested this pom file, and it worked for me just fine. 
When you build this via maven, maven creates the target/p2-repo directory. This has the p2-repository which contains the complete p2-repo including artifacts.jar and content.jar. You can just use this folder to install features, or you can host it somewhere. There're no special requirements on hosting.


<project xmlns="http://maven.apache.org/POM/4.0.0"
         xmlns:xsi="http://www.w3.org/2001/XMLSchema-instance"
         xsi:schemaLocation="http://maven.apache.org/POM/4.0.0 http://maven.apache.org/maven-v4_0_0.xsd">

    <parent>
        <groupId>org.wso2.carbon</groupId>
        <artifactId>carbon-features</artifactId>
        <version>4.1.0</version>
    </parent>

    <modelVersion>4.0.0</modelVersion>
    <artifactId>mysample-feature-repository</artifactId>
    <version>4.1.0</version>
    <packaging>pom</packaging>
    <name>WSO2 Carbon - Feature Repository</name>

    <build>
      <plugins>
        <plugin>
          <groupId>org.wso2.maven</groupId>
            <artifactId>carbon-p2-plugin</artifactId>
            <version>1.5.2</version>
            <executions>
              <execution>
                <id>2-p2-repo-generation</id>
                <phase>package</phase>
                <goals>
                  <goal>p2-repo-gen</goal>
                 </goals>
                 <configuration>
                   <p2AgentLocation>${basedir}/target/p2-agent</p2AgentLocation>
                   <metadataRepository>file:${basedir}/target/p2-repo</metadataRepository>
                   <artifactRepository>file:${basedir}/target/p2-repo</artifactRepository>
                   <publishArtifacts>true</publishArtifacts>
                   <publishArtifactRepository>true</publishArtifactRepository>
                   <featureArtifacts> 

<!-- change the featureArtifactDef to match your needs -->
                     <featureArtifactDef>
                        org.wso2.carbon:org.wso2.carbon.service.mgt.feature:4.1.0
                     </featureArtifactDef>
                     <featureArtifactDef>
                       org.wso2.carbon:org.wso2.carbon.registry.core.feature:4.1.0
                     </featureArtifactDef>


               </featureArtifacts>
             </configuration>
          </execution>
        </executions>
      </plugin>
    </plugins>
  </build>
</project>


Thursday, March 28, 2013

Changes to webapp Classloading in WSO2 AS 5.1.0


WSO2 Application Server 5.1.0 has introduced a major changes to the Webapp classloading mechanism with a new concept called configurable Runtime Environments. This provides solutions to classloading issues that was present is previous releases. Now, the users will be able to manipulate the webapp dependencies in a fine-grained manner. The current webapps will work just fine with this release, and will also provide an extension of support via a  newly introduced webapp-classloading.xml file.

Starting from Carbon 4.0.0, WSO2 Application Server has gained a lot of momentum. There was special focus on it, and have added lot of major features. We have seen the introduction of CXF for providing full specification support for JAX-WS 2.2, and JAX-RS 2.0, inclusion of Jaggery with WSO2 AS, and a lot of cool features. See the AS 5.0.0 release notes to get a glimpse of those.

With the introduction of the Runtime Environments, now users can control the classloading per-server or per-application. Users can define own runtimes for advanced usages but default runtimes are sufficient for most of the cases. You can control the classloader hierarchy using these Runtimes.
There are 3 default runtimes on AS - Tomcat env, Carbon env, and CXF env.

  1. Tomcat Environment – This is the minimal runtime and is identical to pure Tomcat runtime. Only Tomcat, Servlet, JSP, EL, JSTL are available on server level Classpath. If a user wants additional Jars they need to be packaged with web application or should be placed on Tomcat Environment extension directory. 
  2. Carbon Environment - Tomcat Environment + Carbon Environment. This does not provide CXF or Spring dependencies. If a user wants additional Jars they need to be packaged with web application or should be placed on Carbon Environment extension directory.
  3. CXF Environment - Tomcat Environment + CXF + Spring - CARBON. This does not provide top access Carbon runtime. If a user wants additional Jars they need to be packaged with web application or should be placed on CXF Environment lib directory.


How to Configure

There is a new configuration file called webapp-classloading.xml which was introduced to configure webapp Classloading behavior per-server/per-application basis. This file need to be placed inside META-INF directory of a web application.

ie. {webapp}/META-INF/webapp-classloading.xml

This is quite a simple file containing only one parameter. It would look like the following. 

webapp-classloading.xml


<Classloading xmlns="http://wso2.org/projects/as/classloading">
   <Environments>{Runtime-Environment-Names}</Environments>
</Classloading>

Possible values that you can set for {Runtime-Environment-Names} include,
  • Tomcat
  • Carbon
  • CXF
  • CXF,Carbon
  • {Custom-Exclusive-Env}
  • {Custom-Exclusive-Env},Carbon
e.g – To specify CXF as the runtime environment users should have the following configuration.

<?xml version="1.0" encoding="UTF-8"?>
<Classloading xmlns="http://wso2.org/projects/as/classloading">
   <Environments>CXF</Environments>
</Classloading>

Note:
  • It is possible to specify a combination of environments.
    • E.g – To access some Carbon features on a CXF applications it is possible to specify environment as 'CXF,Carbon'. Order is not important which means 'CXF,Carbon' and 'Carbon,CXF' have the same effect.

Runtime Environment extensions

It is a common requirement to share dependencies among number of applications without packaging with each and every application. In such cases following extensions directories can be used to place common dependencies.
  1. Tomcat Environment - ${carbon.home}/lib/runtimes/ext/
  2. Carbon Environment - ${carbon.home}/repository/components/lib
  3. CXF or any Custom Environment – Environment's lib directory. I will explain how to add a custom environment in the next section.
    1. e.g - ${carbon.home}/lib/runtimes/cxf 
    2. e.g - ${carbon.home}/lib/runtimes/ABC
Note :-
Dependencies placed on Tomcat Environment extension directory are visible to all the environments and it is required to identify the impact before placing dependencies on above environments. As an example placing incompatible Spring Dependencies on ${carbon.home}/lib/runtimes/ext/ can cause issues on CXF runtime environment (CXF environment also contains Spring dependencies). In such cases those incompatible dependencies should be packaged inside the web application and should deploy with Tomcat Environment configuration, then other application won't be effected.

Adding custom Runtime Environments


By adding new <ExclusiveEnvironments> entry to the {carbon.home}/repository/conf/tomcat/webapp-classloading-environments.xml file users can define custom runtimes. But this is recommended for advanced usages only. You will not need this in most common use-cases.
e.g – Define a custom Runtime Environment for Spring
  • Add following entry to {carbon.home}/repository/conf/tomcat/webapp-classloading-environments.xml file.

<ExclusiveEnvironments>
    <ExclusiveEnvironment>
        <Name>Spring</Name>
        <Classpath>${carbon.home}/lib/runtimes/spring/*.jar;${carbon.home}/lib/runtimes/spring/</Classpath>
    </ExclusiveEnvironment>
</ExclusiveEnvironments> 
  • Create and copy related Spring dependencies to the {carbon.home}/lib/runtimes/spring/ directory. As you see, the directory name is derived from the Classpath attribute we just set above.

Miscellaneous

  • AS 5.1.0 ships core CXF 2.7.3 dependencies and core Spring 3.0.7 dependencies under CXF runtime environment. If users want to upgrade to different CXF versions they are two options available.
    • Upgrade CXF runtime environment – Users can remove existing CXF/Spring and dependent Jars from “{carbon.home}/lib/runtimes/cxf” directory and can place new CXF/Spring Jars. 
    • Instead of upgrading server level CXF dependencies, users can package all the required Jars with in the Web-INF/lib directory of the application and deploy it with "Tomcat" runtime environment.
  • If the user want to add optional CXF/Spring jars, they can copy them into "{carbon.home}/lib/runtimes/cxf" directory but need to ensure those new dependencies are compatible with existing CXF/Spring Jars.

Saturday, March 23, 2013

WSO2 AS 5.1.0 Third-party Jar version updates


With the release of WSO2 Application Server (AS) 5.1.0 which is based on Carbon kernel 4.1.0, we have done major upgrades to the dependent jars used by WSO2 AS. Major upgrades include some long waited things like Servlet 3.0, JSP 2.2. Following is a list of upgraded versions of built-in jars inside WSO2 AS.


PackagePrevious versionNew Version
Tomcat Runtime 7.0.287.0.34
Servlet3.0
JSP 2.02.2
EL 1.02.2
JSTL 1.11.2
CXF Runtime 2.6.12.7.3


We have upgraded CXF runtime to 2.7.3 primarily because there were two new critical security advisories discovered. [1] [2] The WSO2 AS 5.0.0 and 5.0.1 has been shipped with CXF 2.6.1. So, users are advised to upgrade the WSO2 AS version or at least the CXF versions.

Tomcat version was upgraded from 7.0.28 because there were new security vulnerabilities discovered there. [3], [4], [5]

[1] -  http://cxf.apache.org/cve-2013-0239.html
[2] -  http://cxf.apache.org/cve-2012-5633.html

[3] -  CVE-2012-4431 Apache Tomcat Bypass of CSRF prevention filter - https://mail-archives.apache.org/mod_mbox/tomcat-announce/201212.mbox/%3C50BE536F.6000705@apache.org%3E
[4] -  CVE-2012-3546 Apache Tomcat Bypass of security constraints - https://mail-archives.apache.org/mod_mbox/tomcat-announce/201212.mbox/%3C50BE5367.6090809@apache.org%3E
[5] -  CVE-2012-4534 Apache Tomcat denial of service - https://mail-archives.apache.org/mod_mbox/tomcat-announce/201212.mbox/%3C50BE535A.9000600@apache.org%3E


Tuesday, February 12, 2013

WSO2 ESB NativeWorkerPool Error

Are you getting the NativeWorkerPool uncaught exception, and is unable to determine why this happens in WSO2 Enterprise Service Bus (ESB). If so, read on. There can be several issues that could lead to NativeWorkerPool exception. So, to determine the actual cause for this, you should read the remaining stack trace. 

For example, you may see an exception like the following. [1] There, if you read the third line, you'll notice that it says ...synapse.endpoints.IndirectEndpoint.readyToSend(...). If your stack trace also shows that, then error issue here is quite simple. First of all, we can determine you are using load balance endpoint since it's trying to determine an actual endpoint to send the request to. So, open up your proxy service and get to know what are the actual endpoints that it uses to load balance. 

Make sure that all the endpoints specified there exists. There may be a type between the endpoint name, and reference you specified inside the proxy service. The below error happens due to this reason.


[1]
ERROR - NativeWorkerPool Uncaught exception 
java.lang.NullPointerException 
        at org.apache.synapse.endpoints.IndirectEndpoint.readyToSend(IndirectEndpoint.java:74)         at org.apache.synapse.endpoints.algorithms.RoundRobin.getNextEndpoint(RoundRobin.java:100) 
        at org.apache.synapse.endpoints.LoadbalanceEndpoint.getNextChild(LoadbalanceEndpoint.java:274) 
        at org.apache.synapse.endpoints.LoadbalanceEndpoint.send(LoadbalanceEndpoint.java:105) 
        at org.apache.synapse.mediators.builtin.SendMediator.mediate(SendMediator.java:87) 
        at org.apache.synapse.mediators.AbstractListMediator.mediate(AbstractListMediator.java:60) 
        at org.apache.synapse.mediators.base.SequenceMediator.mediate(SequenceMediator.java:114) 
        at org.apache.synapse.core.axis2.ProxyServiceMessageReceiver.receive(ProxyServiceMessageReceiver.java:154) 
        at org.apache.axis2.engine.AxisEngine.receive(AxisEngine.java:181) 
        at org.apache.axis2.transport.http.HTTPTransportUtils.processHTTPPostRequest(HTTPTransportUtils.java:172) 
        at org.apache.synapse.transport.nhttp.ServerWorker.processEntityEnclosingMethod(ServerWorker.java:408) 
        at org.apache.synapse.transport.nhttp.ServerWorker.run(ServerWorker.java:259) 
        at org.apache.axis2.transport.base.threads.NativeWorkerPool$1.run(NativeWorkerPool.java:173) 
        at java.util.concurrent.ThreadPoolExecutor$Worker.runTask(ThreadPoolExecutor.java:886) 
        at java.util.concurrent.ThreadPoolExecutor$Worker.run(ThreadPoolExecutor.java:908) 
        at java.lang.Thread.run(Thread.java:662) 

Sunday, January 20, 2013

How to remove a child from Axiom object model


Just wanted to point out that there is a difference in API of removing a child between Axiom and DOM. The API of removing a child from a xml tree is different between Axiom and DOM. In DOM, we do following to remove a child.

childNode.getParentNode().removeChild(parentNode);

where childNode is an org.w3c.dom.Node instance.

Basically, what the above does is, when you want to remove a node from a document, it gets the parent node, and then calls the #removeChild to remove the given node from parent.

With Axiom, it's different. What we do is get the child node, and remove it's parent reference. For example,

            element = omFactory.createOMElement(name, null);
            OMElement element = (OMElement) xpathExpression2.selectSingleNode(documentElement);
            element.detach();